Recipe Tasty Red velvet cake #weeklyjikonichallenge

Red velvet cake #weeklyjikonichallenge ~ Happy Cooking - now is being sought after by many civil around us, one of them is We. they indeed have get used to use internet on ponsel to looking for information to be used insight. Therefore Admin give Information related Red velvet cake #weeklyjikonichallenge is could you make it insight. Red velvet cake is traditionally a red, red-brown, crimson or scarlet-colored chocolate layer cake, layered with ermine icing. Traditional recipes do not use food coloring. Red Velvet Cake is not just a chocolate cake with red food colouring added.
 This recipe produces the best red velvet cake with superior buttery, vanilla, and cocoa flavors, as well as a delicious tang from buttermilk. Red velvet cake has an acidic taste that comes from the use of buttermilk and vinegar as well as the cream cheese in the frosting. The acidity is balanced out by the sweetness of the cake itself. we could cook Red velvet cake #weeklyjikonichallenge using tools 13 ingredient 9 step. this is it Your way for make it.
The ingredients for cooking Red velvet cake #weeklyjikonichallenge
- You need 2 cups all-purpose flour.
- Also add 1 teaspoon baking soda.
- Also add 1 teaspoon baking powder.
- You need to prepare 1 teaspoon salt.
- capable need to provide 2 Tablespoons unsweetened, cocoa powder.
- capable need to provide 2 cups sugar.
- Please prepare 1 cup vegetable oil or canola.
- Buddy also needs 2 eggs.
- capable need to provide 1 cup buttermilk.
- Also add 2 teaspoons vanilla extract.
- capable need to provide too 2 teaspoons red food coloring, more or less depending on how deep you want the color.
- Buddy also needs 1/2 cup plain hot coffee or water.
- Buddy also needs 1 teaspoon white distilled vinegar.
Remove the cakes from the oven and run a knife around the edges to loosen them from the sides of the pans. Red velvet cake has been around for a long time. The Waldorf-Astoria Hotel in New York claims to have invented it, but since that time it has. The Best Red Velvet Cake recipe is now here!
The Step by step how to make Red velvet cake #weeklyjikonichallenge
- Preheat your oven at 180 degrees celcius. In a medium bowl, whisk together flour, baking soda, baking powder, cocoa powder, and salt. Set aside..
- In a large bowl, combine the sugar and vegetable oil..
- Mix in the eggs, buttermilk, vanilla and red food coloring until combined..
- Stir in the coffee or water and white vinegar..
- Combine the wet ingredients with the dry ingredients a little at a time, mixing after each addition, just until combined. (Batter will be thin).
- Pour the batter evenly into each pan (2 nine inch baking tins).
- Bake in the middle rack for 30-40 minutes or until a toothpick inserted in center comes out with moist crumbs clinging to it. Do not over bake as the cake will continue to cook as it cools..
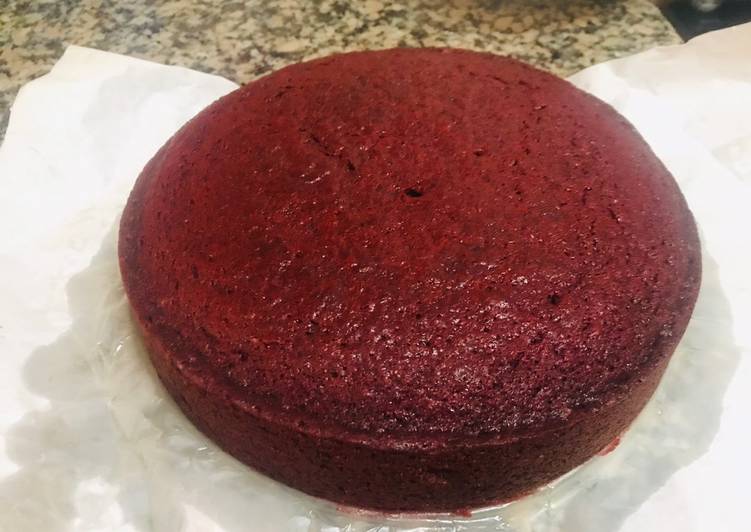
- Let pans cool on a cooling rack until the pans are warm to the touch. Gently remove the cakes from the pan and let them finish cooling..
- Frost the cake with cream cheese frosting when the cakes have cooled completely. Enjoy 😊.
This red velvet cake recipe is the one my mom always used. Red Velvet Cake is one of those classic recipes that get requested over and over. That rich red color is stunning and paired with a cream cheese frosting, you can't really go wrong. This red velvet cake recipe is SUPERB!!!! And it passes the stick to the back of the fork test like a champ!
That's the discussion or tutorial about Red velvet cake #weeklyjikonichallenge Thank you for your visit, if you feel this post on this blog helpful, support our by sharing article this website to social media accounts your favorite like facebook, instagram, pinterrest, Instagram and so forth Or Our can also bookmark this site this with the title Red velvet cake #weeklyjikonichallenge This article grouped into categories and also this article it is sourced from https://www.cookpad.com ... Happy Cooking :)